⌨️ Mastering Touch Typing: A Guide to Proper Finger Placement
Typing efficiently isn’t just about speed — it’s about accuracy, comfort, and long-term health. Whether you're a beginner or looking to refine your skills, learning the correct finger positioning is the foundation of touch typing.
What Is Touch Typing?
Touch typing is the ability to type without looking at the keyboard. It relies on muscle memory and proper finger placement, enabling you to type faster and more accurately while reducing hand strain.
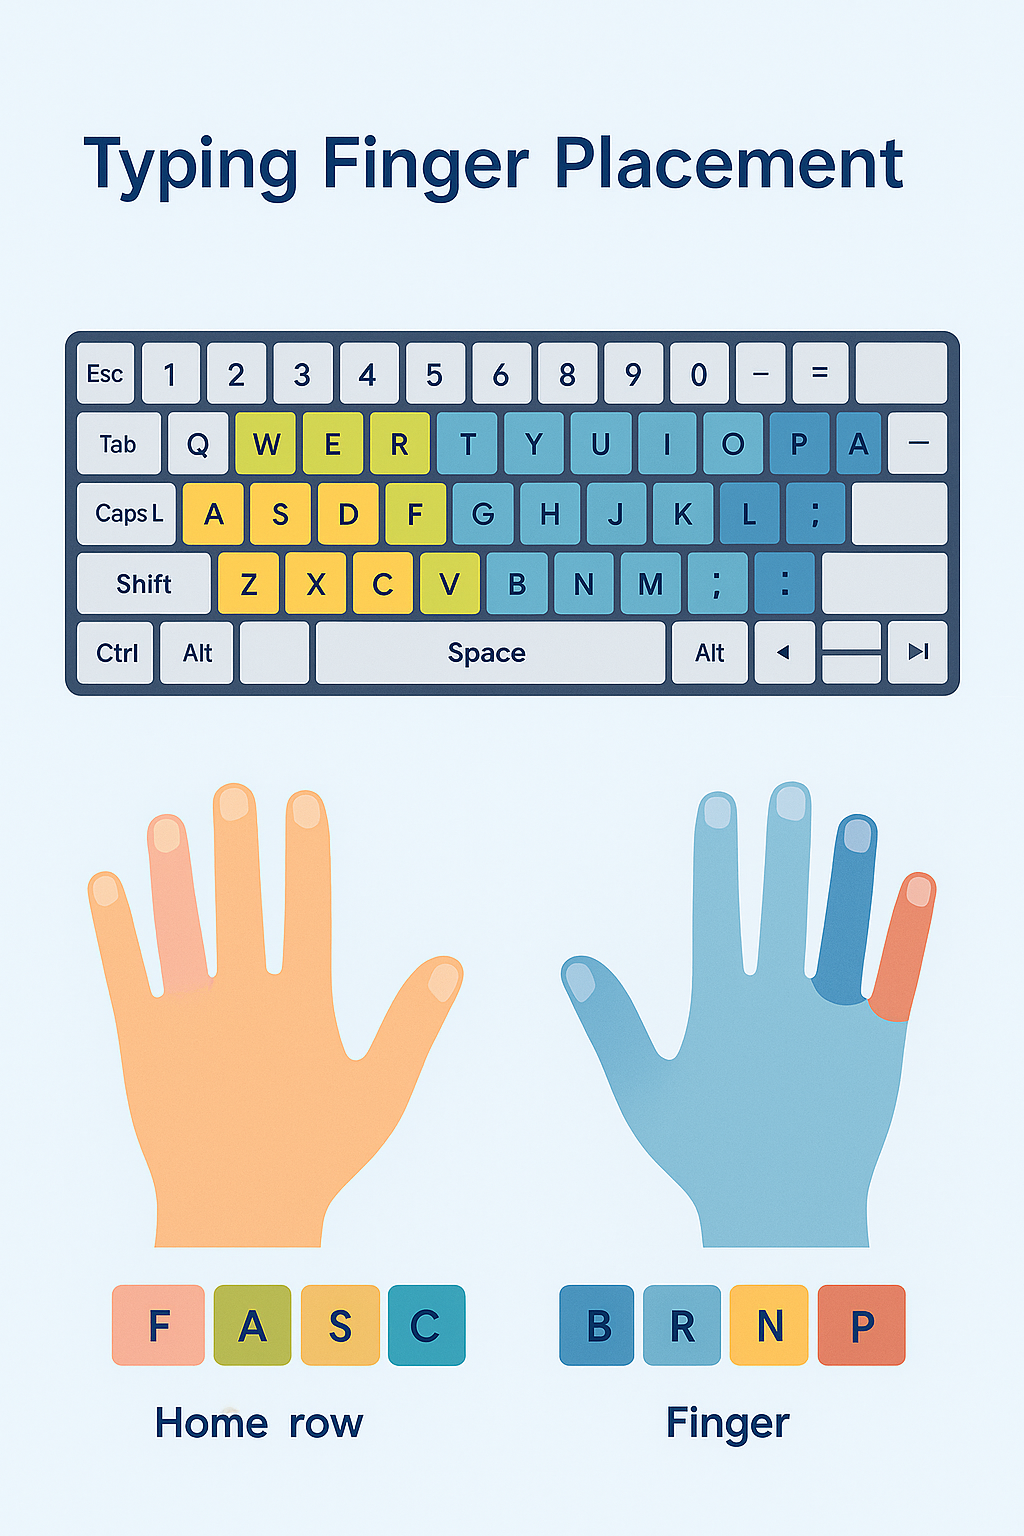
The Home Row
The home row is the center row where your fingers naturally rest:
Left hand: A (pinky), S (ring), D (middle), F (index)
Right hand: J (index), K (middle), L (ring), ; (pinky)
Both thumbs should rest lightly on the Spacebar. F and J keys usually have small bumps to guide your fingers.
Finger Responsibilities
Each finger has a specific zone:
Top Row:
Left hand: Q, W, E, R, T
Right hand: Y, U, I, O, P
Bottom Row:
Left hand: Z, X, C, V, B
Right hand: N, M, ,, ., /
Special Keys
Use the pinky fingers for most special keys:
- Shift (opposite hand of the key being capitalized)
- Enter, Backspace (right pinky)
- Tab, Caps Lock, Ctrl (left pinky)
- Spacebar (typically right thumb)
Practice Tips
1. Start slow — focus on accuracy first.
2. Don’t look at the keyboard.
3. Use typing software or games to build muscle memory.
4. Keep good posture and relaxed wrists.
5. Practice daily, even 10–15 minutes helps!
Final Thoughts
Learning to type with the correct technique may feel awkward at first, but it pays off in speed, comfort, and health. Stick with it, and you'll soon type faster — and smarter.
Share Keyup with friends: